I have Solar! It just took FAR longer to do than I thought it would.
Running and routing the 12/3, (12 gauge, 3 conductor) 28 foot run to the Breaker panel was every bit the Pain-in-the-Ass I thought it would be. I had to route over and around cross-beams, waste tanks, and heater ducting. But I did it! Installing the ATS (Automatic Transfer Switch) was easy in comparison.
The Panel wiring run from the roof turned out to be a bigger challenge than I anticipated. Planning and drilling the hole in the roof was scary. The curved roof in the middle has a 5-6” space filled with wires and insulation that I had to be careful about. I also wanted the wire run to be “invisible” from the inside, so care was taken to hide the hole. I’m pretty proud the way it turned out; it looks professional.
8 gauge ultra-flexible pure copper wire was used to cut down on loss for the 18 foot run from the roof to the Controller. I found and ordered this “Welding Cable” from Amazon that sounded perfect, but turned out to have rubber insulation. This rubber sheath wanted to make friends with every bend, corner, and other cable it came across… Damn, it took a while. 😒
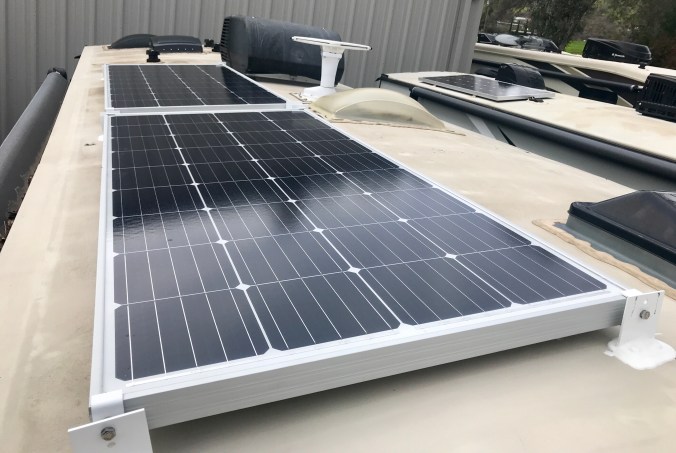
When a sunny day presented itself, I had my son help me install the panels on the roof. Renting a mechanical lift, we got the panels up on the eleven foot roof and installed them. It took just moments to connect the wiring.
We closed the breakers, fired it up, and it worked! Damn, it felt good.
Finishing up the job takes time; again, there have only been few non-rainy days since January. First I sealed all screws, cable entry ports, and Panel mounts on the roof. Next, the Backboard in the storage compartment. Using the compartment for storage of misc light and heavy items is necessary and I needed to protect some of the components from damage. I installed a clear Plexiglas cover over the Shunt to protect the tiny circuit board on the bottom. Fabricating a metal cover over the wire hole feeding the Backboard took some work, but was needed to protect the wiring and hide the hole.
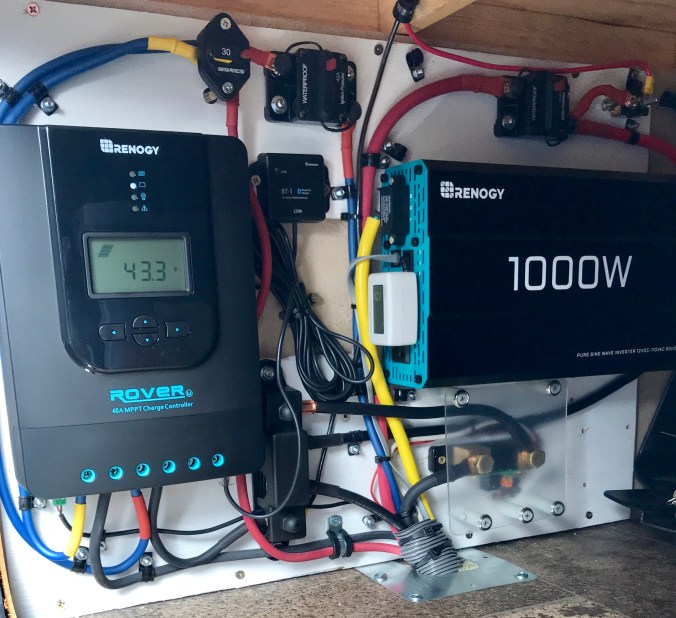
In testing, everything works great! The Transfer Switch works like it should when the Inverter is running, and the Solar Controller really does handle the Solar conversion. The whole purpose of the MPPT controller is to maximize the transfer of energy from the Solar to the Battery. The Panels are wired in series to deliver 42 volts at up to 9.5 amps. The controller changes that to up to 13.8 volts and up to 32 amps. This is happening and I am stoked.
The Fridge uses 27 amps, or 350 watts from the inverter when it’s running. That’s bad since I only installed 400 watts of Solar on the roof! (Two 200w panels) Since Solar Panels almost never operate at 100%, I’ll be lucky to simply meet the load on most days. I’m certain I’ll need a third 200w panel, but I have until May to install it. With 600 watts I should be able to handle even lightly cloudy days with no problem. The goal of not running the Propane while driving should be met.
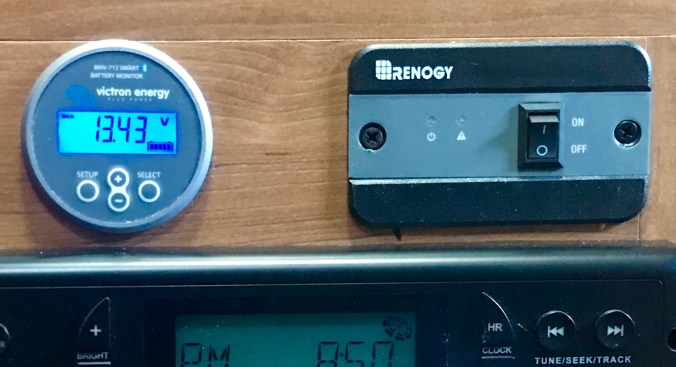
Overall, I think this project will be the most useful addition I’ve made to the Travel Trailer. Dealing with the batteries was a major problem before because the voltage based monitor just didn’t tell me the true state of the batteries. Draining the batteries down led to their premature death. Running a generator, even though it’s a “Quiet” model, made fellow campers very unhappy. (Especially in the evening, since I was hiking all day…) I’ll be more willing to Boondock (Dry Camp) now, which is really why I bought the damned thing!
Next, waiting for nice weather to pull the Travel Trailer out of storage and do some camping! Perhaps the coast, since the mountains are too cold and I can put the new Solar system through some real world tests. Such as: Do I really need the third panel, or can I make it with what I have.

What an accomplishment. Congratulations!
LikeLiked by 1 person
Good job!
LikeLiked by 1 person
Mike! Dude! I’m very impressed, by and proud of, you.
LikeLiked by 1 person