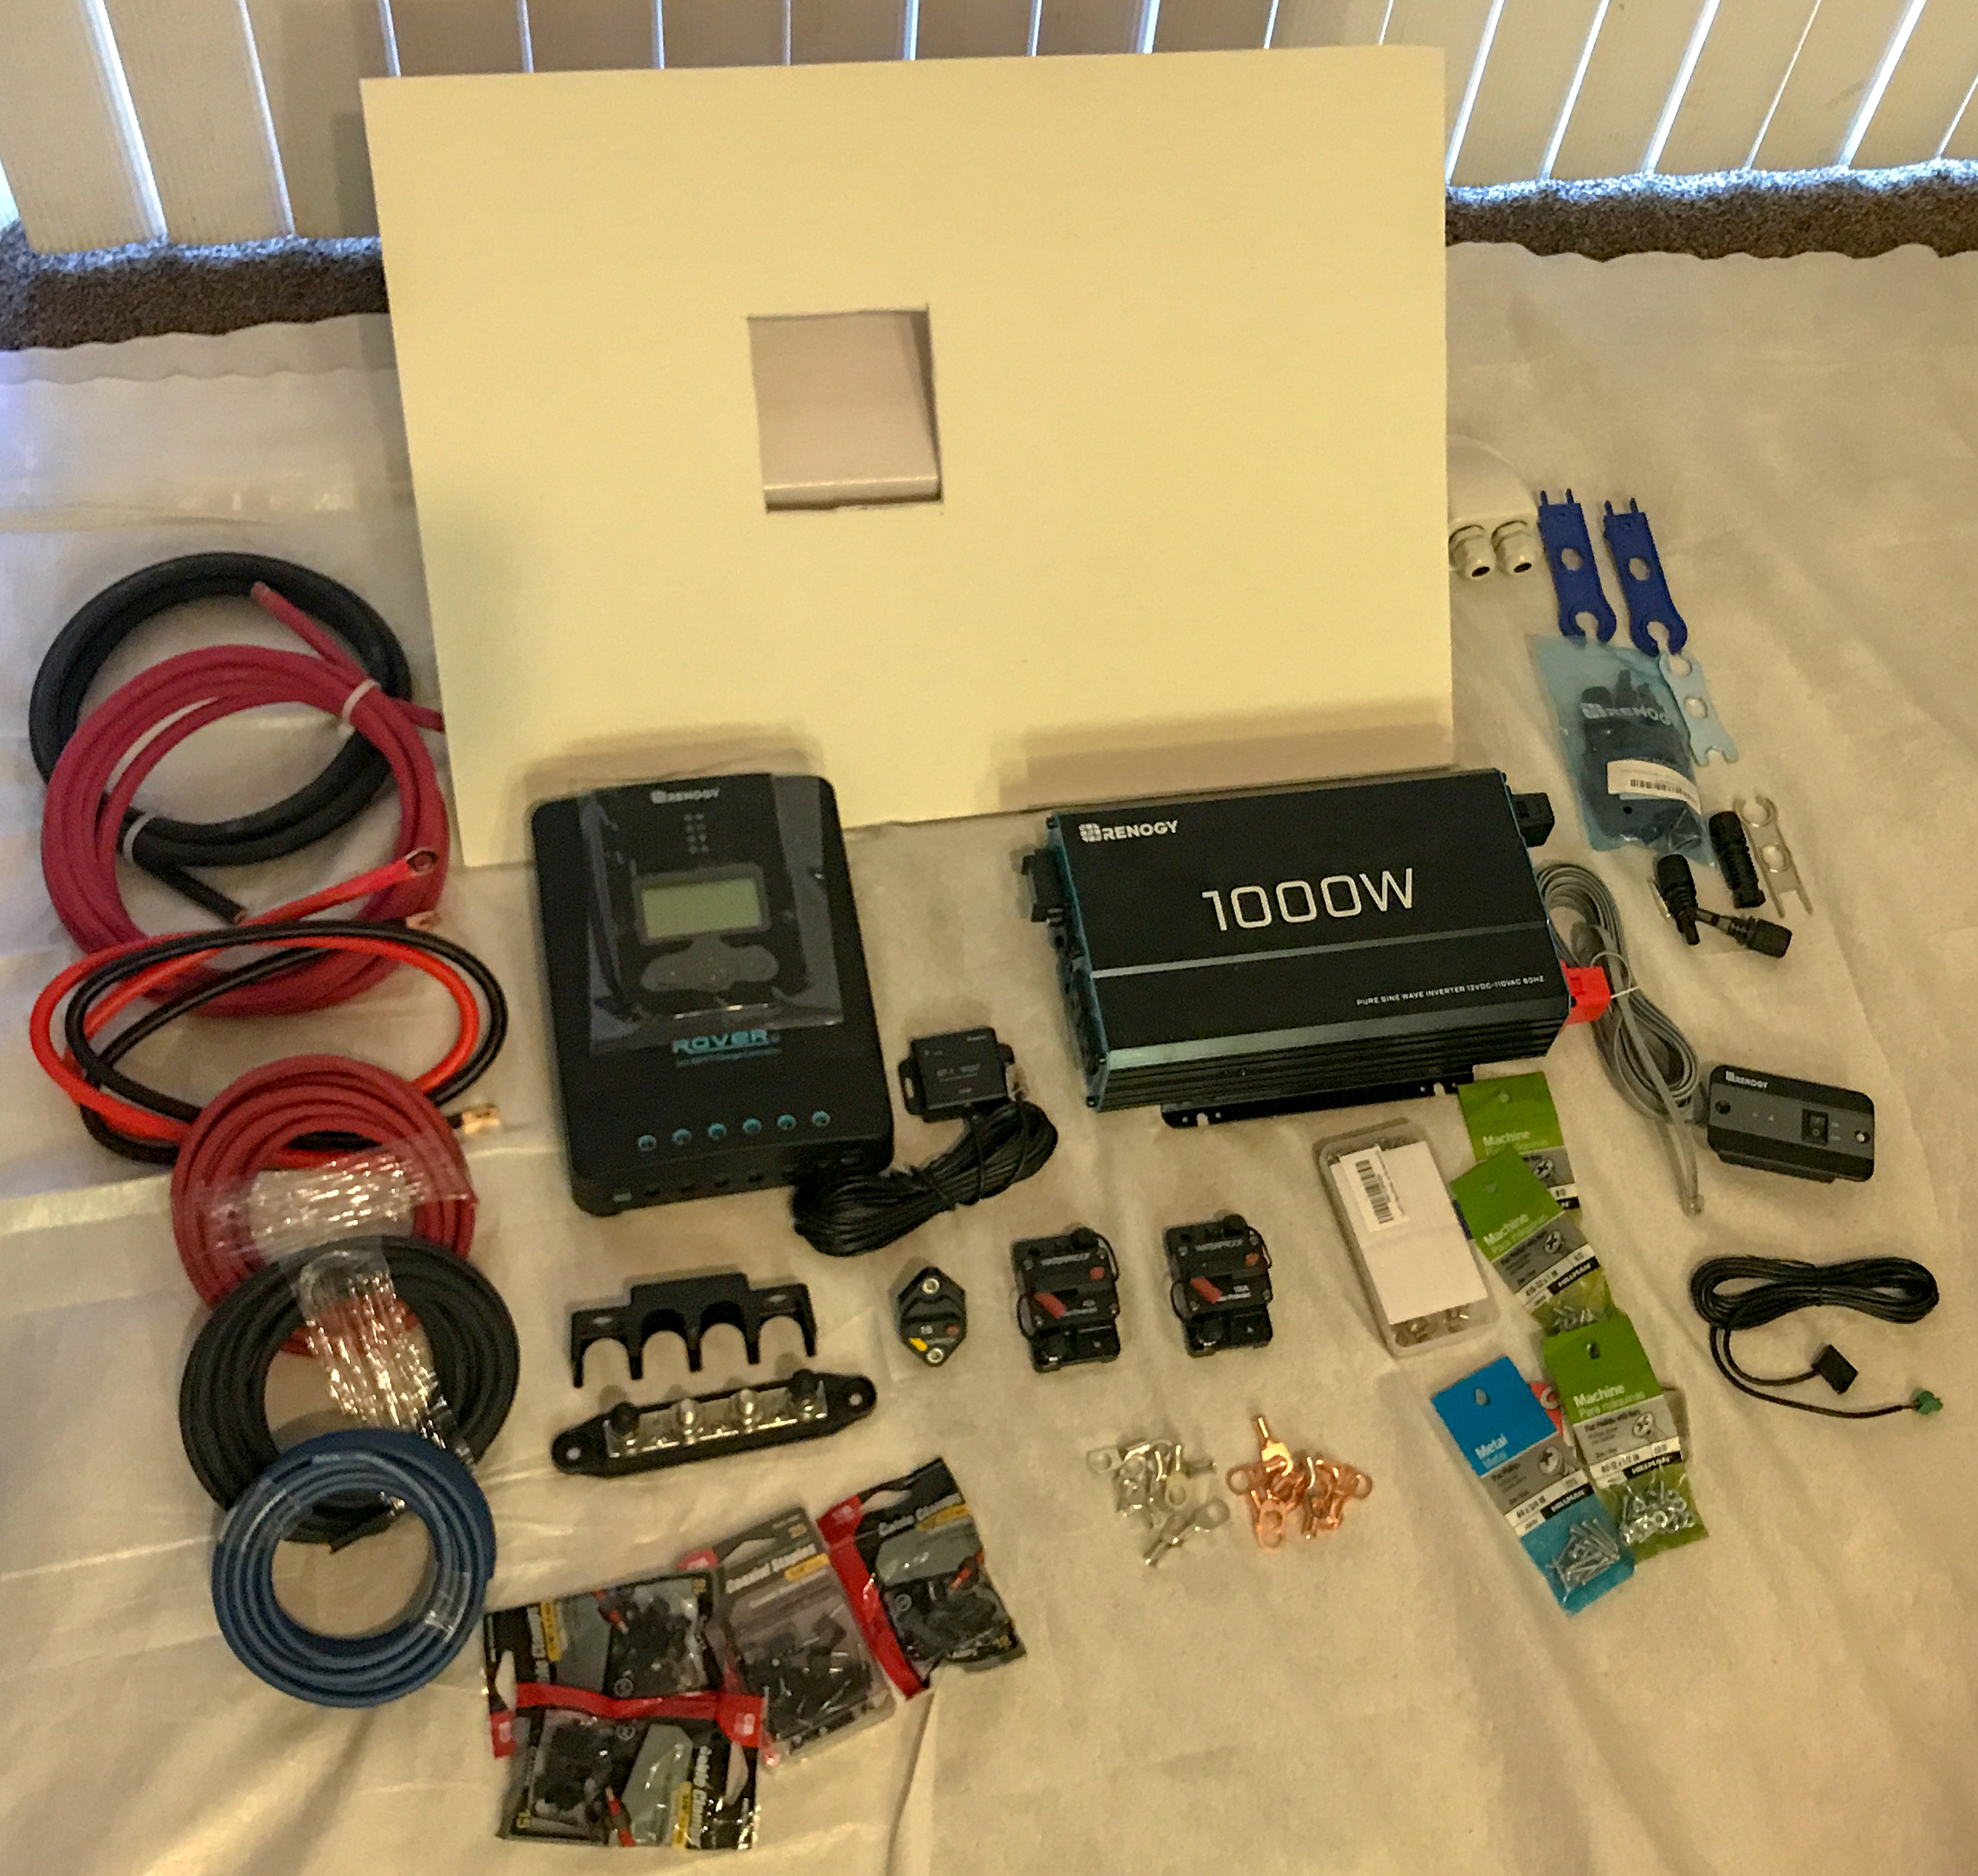
I purchased all of the components except the Solar Panels themselves. Those go on last and I have a huge amount of work to do before I get to that point.
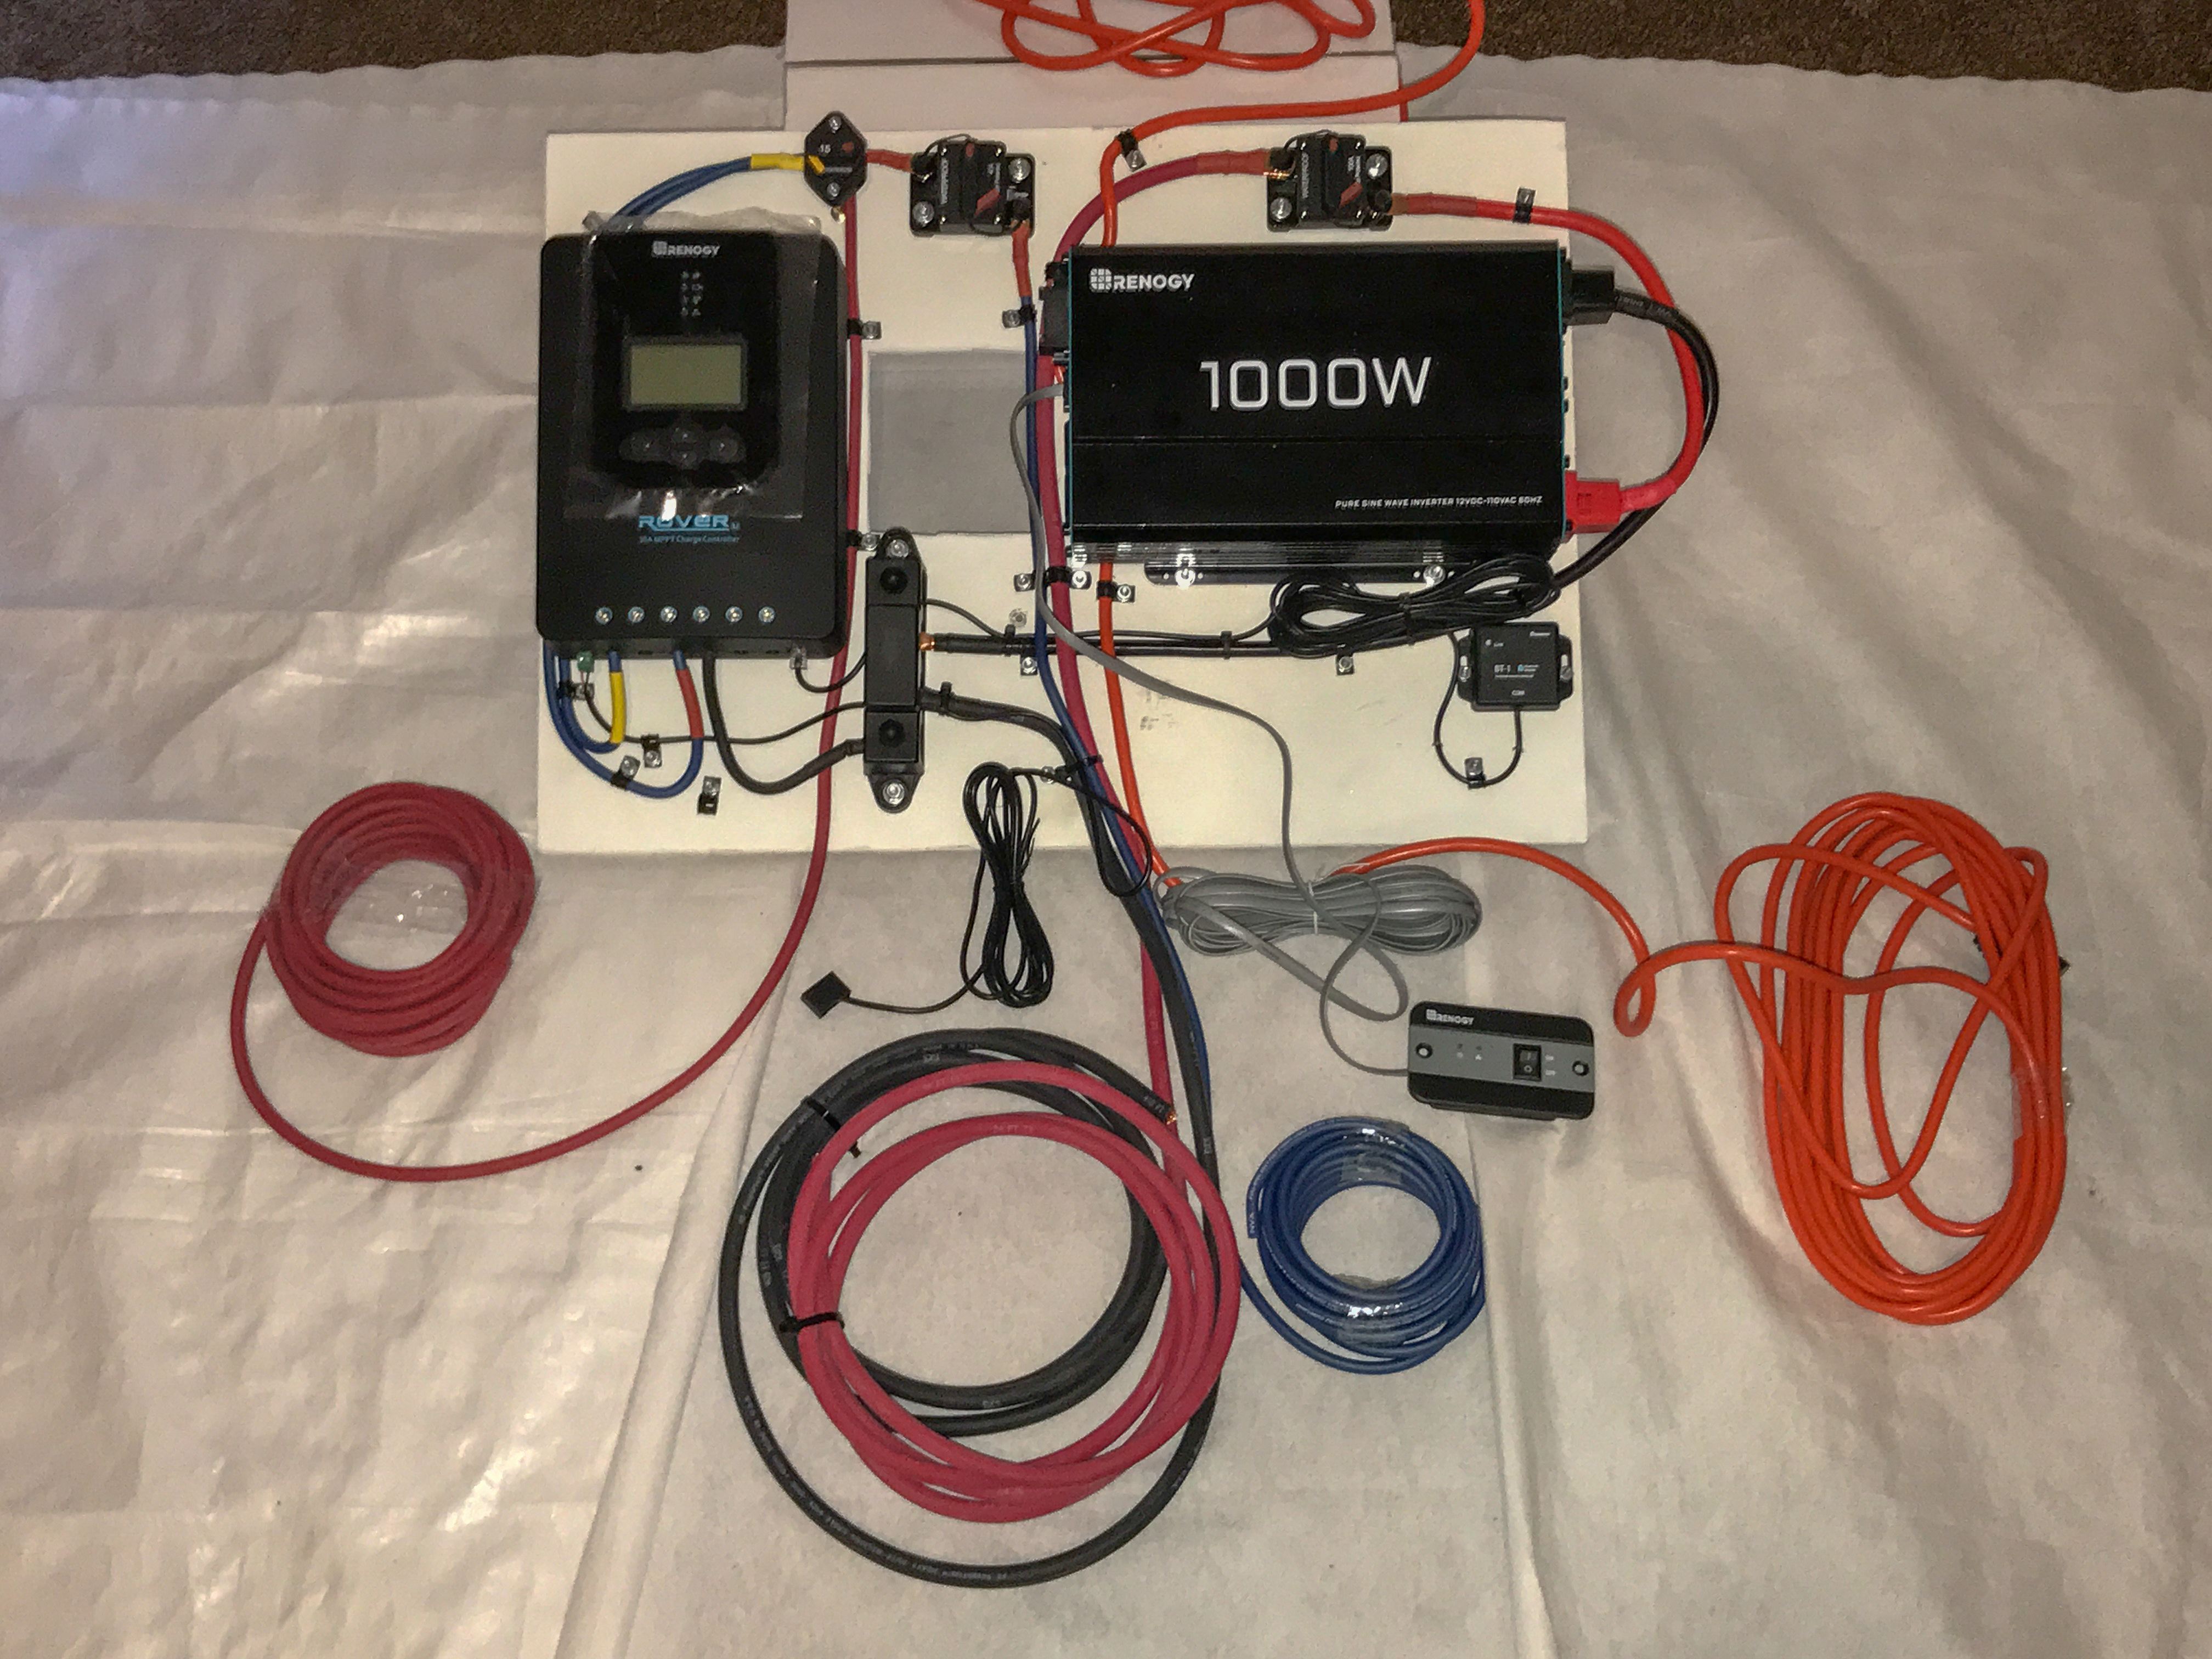
To make things easier, I will be using a small piece of 1/4″ plywood as a “Backboard” to preinstall everything. The front storage compartment that will house the equipment is cramped: 24″ wide, 17″ high, and the full width of the trailer. I’ll be installing the Backboard near one opening. Note the square hole in the middle fits over an existing switch plate.
Trying to squeeze all of the parts onto the panel was more of a challenge than I thought! I had to plan for cabling; some of it 8 gauge, some 2 gauge, some AC cable to outlets. Then route everything in as neat a way as possible. Here is the finished Backboard.
Completing the Backboard required new tools. I love new tools. I’ve never crimped large cable before, so I purchased a Hydraulic Cable Lug Crimper. It works awesome! Makes nice professional crimps on the 2 gauge and 8 gauge lugs. And DAMN those heavy copper lugs are expensive, (nearly $50!) since I needed three lug sizes for each cable size. Six sizes total. Finishing the lugs with heat shrink tubing involved purchasing a Heat Gun, but those are cheap. Overall I’m happy with the results. And I got new tools!
The Man who dies with the Most Tools, wins. Or something like that…
Most of the cable will be routing through the floor to either forward to the Batteries on the tongue or to the middle of the trailer where there is a column that goes from the floor to ceiling. One AC cable goes to the top of the compartment, then to the Bedroom which is in front of the storage compartment.
The Battery side gets four cables: 2ga Common Negative to Battery, 2ga Positive from the Inverter to trailer side of cutoff switch, 8ga from the Controller to Battery side of cutoff switch, and a temperature sensor from the controller to the batteries.
The center column gets two 8ga for the Solar Panels, a flat cable for the Inverter Remote, and 16/3ga AC cable for the TV outlet. I will be installing two outlets that are just for the Inverter: one in the bedroom and one near the existing TV outlet.
Routing the cables is the bigger job. My trailer has a sealed under-carriage that I have to drop in order to route all the cable, which is not a small job. But the BIGGEST issue is drilling a hole through the roof for the Solar wiring. There are a zillion ways to screw that up, and I’m stressing over how to best handle it. The final mounting of the Solar Panels is the easiest part!
The next post will have the cable drama. Stay tuned.

Test
LikeLike